Thursday, 12 March 2015

Recipe: Lemony Cupcakes

Posted by Lucy at 12:29 3 comments
If you're from the UK, you'll know that it's Red Nose Day tomorrow, so yesterday afternoon, I decided I'd bake some cupcakes. If I'm totally honest with you, I'm not really a cupcake person, but, boy, these were good!


In case you're thinking "how are these anything to do with Red Nose Day?", I'll explain. The icing was supposed to be red but unfortunately we didn't have much food dye left, so they're orange instead! But, never to worry! Anyway, for those of you who fancy baking these amazing fairy cakes, here's the recipe:

Ingredients:

For the cupcakes
  • 115g butter (diced)
  • 115g caster sugar
  • 115g self-raising flour
  • 2 eggs
  • 1 lemon (the zest and juice)
For the buttercream icing
  • 150g butter (diced)
  • 300g icing sugar
  • 2tbsp lemon juice
  • Food colouring (optional)
For decoration
  • 12 Maltesers
Method:
  1. First of all, preheat the oven to 180˚C and line a 12-hole muffin tin with paper cases.
  2. Then, place the butter, caster sugar, eggs, lemon juice and the lemon zest into a large mixing bowl before sifting in the flour, incorporating air by lifting the sieve quite high.
  3. Now, using a handheld mixer, whisk together all the ingredients until the mixture is light and creamy.
  4. Divide the mixture evenly between the twelve muffin cases.
  5. Bake in the oven for 18-20 minutes or until well-risen, golden brown and a skewer inserted into the centre of a cake comes out clean. With oven gloves, remove the muffin tin from the oven and carefully transfer the cupcakes to a wire rack where they can cool.
  6. Meanwhile, prepare the buttercream icing. Simply combine the butter, icing sugar and lemon juice using a hand-held mixer on it's lowest setting (you don't want the icing sugar to go everywhere!).
  7. Once the cakes have cooled completely, spoon the buttercream into a piping bag and swirl on the buttercream for an artistic finish. Or, alternatively, you can just dollop some icing straight onto the cake and use the back of a spoon to spread it evenly across the surface.
  8. Top each cupcake with a Malteser and you're done! Ta-dah!
I hope this recipe has inspired you to put on your apron and get baking for Comic Relief!

Lucy x


Friday, 6 March 2015

February Beauty Favourites

Posted by Lucy at 10:19 0 comments
Hello everyone! It's the beginning of another month (where has February gone?), so it's time for another Favourites post. Here are some beauty products I've been loving recently...

 KIKO Velvet Touch Creamy Stick Blush RRP £7.90
It's a known fact that I own way to many blushers, but when I saw this one, I couldn't resist the temptation. I love this product; it applies like a dream and gives my cheeks a subtle glow. This is perfect for school as it's quite natural-looking and doesn't make me look overly made-up. I have it in the shade Coral Rose, which, I think, is perfect for spring.

The Body Shop Born Lippy Passionberry Lip Balm RRP £2.00
I LOVE this lip balm! It smells gorgeous, looks amazing and is so glossy! It's an absolute must-have in any girl's collection!

LUSH Bubblegum Lip Scrub RRP £5.50
I bought this late November and never really got round to using it until quite recently. It works wonders on my chapped lips and makes them feel really soft. I absolutely adore the taste of this as well. It's so good!

Liz Earle Cleanse and Polish Hot Cloth Cleanser RRP £15.50
This cleanser is my #1 skincare staple! I use this on a daily basis and ever since I began using this a while ago, I have seen a real difference in my skin; although I sometimes get the odd spot, my skin is much clearer than it was. It removes every scrap of make-up off your face, too! To read a detailed review of Liz Earle's Cleanse and Polish, click the link below!

Real Techniques Blush Brush RRP £8.49
I'd heard a lot about Real Techniques and how utterly amazing their products were, so, giving into the hype, I ordered their blush brush from Amazon. It's amazingly soft and picks up just the right amount of blusher/bronzer/powder.


What have you been loving recently? Let me know in the comments below! (Hey, that rhymes!)


Lucy x

Saturday, 28 February 2015

DIY Manicure

Posted by Lucy at 07:40 0 comments
Having a manicure professionally done can be expensive and time-consuming, so why not do it yourself in the comfort of your own home. Here's how...
You'll need:

  • Nail polish remover
  • Cotton wool pads
  • Nail scissors
  • Nail file
  • Nail buffer (optional)
  • Cuticle cream/oil
  • Cuticle stick
  • A bowl of hot water
  • Hand cream
  • Base coat
  • Nail polish
  • Top coat

Instructions:

  1. First of all, remove any old nail polish you may have had on. Then trim your nails and file them into the desired shape - most people opt for a rounded edge. (If you wish, you can also smooth the nail's surface with a nail buffer.)
  2. Next, rub your cuticle cream/oil into the nail beds before placing your hands in a bowl of hot water for a moment or two. This will help the cream/oil to soften up the cuticles.
  3. Carefully push back the cuticles using a cuticle stick. Then wipe off the cream/oil and massage hand cream into your hands and nails
  4. Now you're ready to get painting! Rest one hand firmly on a flat surface (desk, table, worktop etc.) and steady your painting hand by setting that elbow onto the surface, too.
  5. Paint on a base coat. This may seem like a waste of time, but it stops the polish from staining your nails.
  6. Paint on a layer of your chosen nail polish. Let it dry, then paint on another. Don't worry too much about accidentally painting your skin as this is easily fixable: simply dip a cotton bud in nail polish remover and use it to tidy up.
  7. Finally, add a layer of top coat (clear nail polish). By doing this, it adds shine and helps the colour to last longer, as well. Ta-dah! You're done! How easy was that?

What's your favourite nail polish? I like the shade Rhythm & Blues by Rimmel!
I hope you enjoyed this DIY post!
Lucy x

Thursday, 19 February 2015

Liz Earle's Cleanse & Polish Hot Cloth Cleanser

Posted by Lucy at 11:54 4 comments
I'd heard loads of good things about Liz Earle's Hot Cloth Cleanser, so when my mum bought me it as a surprise, I was over the moon! I'd been giving a lot of thought to this product, trying to decide whether I really needed it or not; it's quite a pricey item (£15.50!) and I wasn't sure if I could part with that amount of money on a cleanser.

It turns out, this cleanser is fabulous! It has become my #1 skincare product and I use it every single night without fail. Yes, it's expensive, but in my honest opinion, it's well worth the money. It removes every scrap of make-up (even that stubborn, waterproof mascara!) and is so gentle on the skin. After using this, my face always feels super-clean.
My skin is relatively sensitive I'd say, but so far, this cleanser has caused me no problems whatsoever. Ever since I first began using this, I've noticed a real improvement ; my skin looks and feels so much softer!
Liz Earle's plant-based cleanser works amazingly at lifting dead skin cells to reveal a fresh, radiant complexion.  It also does an exceptional job at moisturising the skin due to the cocoa butter that it contains.
The only negative thing I have to say about the Liz Earle Cleanse & Polish is that it's very expensive and understandably, not everyone is prepared to pay that much. I believe Superdrug do a hot cloth cleanser as well, which I assume is very similar to Liz Earle's - it probably costs a fraction of the price too!
Overall, I think this product is great and I will definitely be repurchasing this when it runs out!
What are your thoughts on the Liz Earle range?
Lucy x

Sunday, 15 February 2015

Minimal Make-Up Routine

Posted by Lucy at 07:50 0 comments
Hello everyone! Today I'm going to be showing you how to create an everyday minimal make-up routine that's perfect for school or simply popping out to the shops.

  1. First of all, I use Bourjois' Happy Light Illuminating Serum Primer to smooth out my complexion, making base application much easier.
  2. Now, I hide any spots or blemishes with my Rimmel Wake Me Up Concealear, patting it in with my index finger.
  3. Then I dab a little bit of the  Body Shop's All-in-One BB Cream onto my cheeks, nose, chin and forehead, blending it outwards.
  4. The next thing I do is take my Real Techniques Blush Brush and sweep a small amount of bronzer all over my face.
  5.  Then I dab Max Factor's Miracle Touch Creamy Blush onto my cheekbones.
  6. Using the shade Chocolate from the W7 In The Buff Palette, I lightly fill in my brows with a small, angled brush.
  7. Finally, I slick on some of the Body Shop's Born Lippy lip balm and that's me done!

I hope you enjoyed this video as much as I enjoyed filming it!
Lucy x

Monday, 9 February 2015

Tanya Burr's Choc Chip Cookies

Posted by Lucy at 10:32 2 comments
Sunday afternoon's are made for baking, so yesterday I decided to bake these amazing choc chip cookies! I found the recipe in Tanya Burr's new book, which, by the way, is absolutely awesome! As they were so tasty, I thought I'd share the recipe with you guys...
Ingredients:
  • 200g butter
  • 300g caster sugar
  • 1 large egg
  • 325g self-raising flour
  • A dash a milk (optional)
  • 200g white chocolate
  • 200g milk chocolate
Method:
  1. To begin, pre-heat your oven to 200˚C, then whisk the butter and sugar together until the mixture is light and fluffy. To make sure the butter blends easily, let it soften at room temperature or to quicken things up a bit, put it in the microwave for a maximum of 10 seconds.
  2. Next, crack an egg into the bowl. Then, gradually add the flour until the ingredients are fully-combined. If the dough appears dry and crumbly, add a dash of milk until it's the perfect consistency.
  3. With clean hands, break the chocolate up into big and small pieces. If you own a Pampered Chef Food Chopper, then use this to cut up the chocolate as it is much quicker than doing it by hand.
  4. Add the chocolate chunks to the cookie dough and, using your hands, spread them as evenly as possible through the mixture.
  5. Shape the mixture into 10 - 12 balls and place them on a baking tray covered in grease-proof  paper. You may need to bake two to three batches as the cookies expand, so it's best to have no more than 3 on one tray.
  6. Bake for 12 minutes. They will look as if they need much longer, but don't do it! Leave them in the baking trays or on a cooling rack for half an hour. They should be gooey in the middle and crunchy on the outside - yum!
These are the ultimate sweet treat and would be perfect for a bake sale or even just to share with your family and friends. Enjoy!

Lucy x

Wednesday, 4 February 2015

January Beauty Favourites

Posted by Lucy at 08:36 3 comments
Happy February everyone! It’s scary how fast January’s flown by, don’t you think? Surely it wasn’t a month ago that we were waving farewell to 2014?! Before we know it, the summer months will be here but let’s not get too ahead of ourselves…
Anyway, here’s a few beauty products I’ve been loving recently:
January Favourites #1
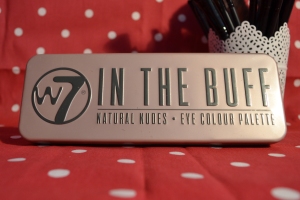
W7 In The Buff Eye Colour Palette RRP £9.95
I’d admired W7’s In the Buff palette in December, so when I received it for Christmas, I was more than happy! It offers a variety of nude shades, both warm and cool.
January Favourites #2
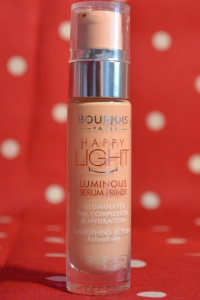
Bourjois Happy Light Luminous Primer RRP £10.99
At first, I was apprehensive to buy this product due to it’s price, but, boy, I’m so glad I did! After applying it, my skin looks far more even, pores appear smaller and my make-up lasts twice as long as usual! This product also leaves me with a natural, healthy-looking glow.
Maybelline Big Eyes
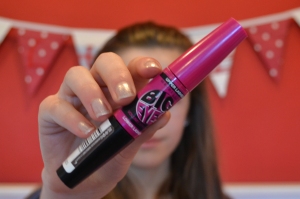
Maybelline Big Eyes Mascara RRP £8.99
I bought this product a while ago, and, at first, I wasn’t too keen so I put it away in a drawer and forgot about it. But, whilst tiding, I rediscovered this amazing mascara and have used it daily ever since. This product adds loads of volume to the lashes and doesn’t go clumpy. It’s by far the best mascara I’ve ever had and I will most definitely be replacing this item when it runs out!
Rimmel Wake Me Up
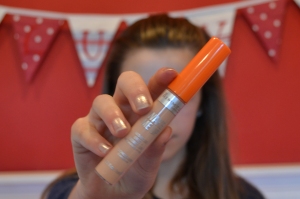
Rimmel Wake Me Up Concealer £5.49
This concealer provides great coverage and really brightens up the eye area! It comes in four different shades: Ivory (the lightest shade), True Ivory, Classic Beige and Soft Beige (the darkest shade). The only negative thing about this product is that it draws attention to dry areas, so probably isn’t the best choice for people with dry skin.
January Favourites #3
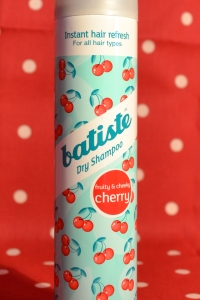
Batiste Dry Shampoo RRP £2.99
 This product instantly refreshes second-day hair, eliminating oiliness from the roots and adding loads of volume and texture. I’d highly recommend this product as it works wonders on dull, lifeless hair desperately in need of a boost. It smells gorgeous too! To read an in depth review on Batiste, click here.
So these are my January beauty favourites! Why not list three of your beauty favourites in the comments below? Have a good evening!
Lucy x
 

Little Miss Blogtastic Template by Ipietoon Blogger Template | Gadget Review